This post will cover adding a redirect for a specific URL in IIS7. In my case I needed to do a redirect from a site with the url www.yourdomain.com/new to a url with a different subdomain, for example new.yourdomain.com. But this example can be used for any redirect in IIS.
To start with you’ll want to make sure your Web Server (IIS) role has the HTTP Redirection Role Service installed. Your role services should look similar the example below.
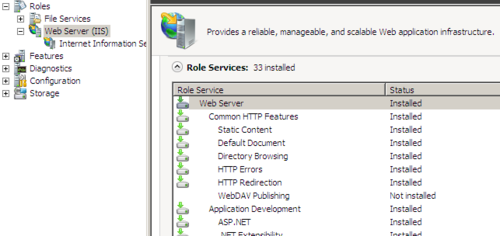
If you don’t have the HTTP Redirection Role installed, select the Add Role Services link. In the Add Role Services dialog box select the HTTP Redirection option from the list and press the Install button. You now should have successfully installed the Role Service within IIS to allow you to perform URL Redirections.
Now you should open the IIS Manager on your server, select one of the sites listed on your server, and in the Features View window under IIS you should see the HTTP Redirect option available to you. The features icon is shown below.

I like to do my redirects from virtual directories (if there already isn’t a directory created), I do this because I work with MVC applications and don’t want a random folder to cause any issues with my main application and routing. What I usually do is create a empty folder called Redirect in my C:\inetpub folder. I then create a virutal directory in the Site I want a redirect performed in, pointed to my Redirect folder I just created.
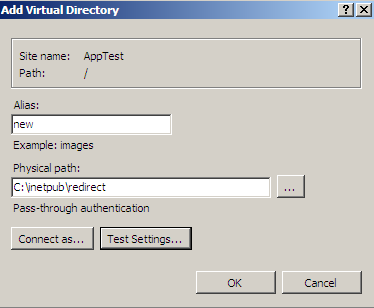
To create the virtual directory right click on the site your working with and in the context menu select Add Virtual Directory, the Add Virtual Directory dialog box should appear. In the alias textbox you’ll want to put the content part of what you want your url to be, in the case of my example www.yourdomian.com/new and then you’ll want to point the physical path to the redirect folder you just created in C:\inetpub. If you are running your site under a named user or a specific user you will want to set that information up through the Connect as button. To test your virtual directory to make sure it is authorizing and authenticating properly you can click the Test Settings button. If everything is good you should see only Green icons in the screen. Your dialog box should look something like the example I have below.
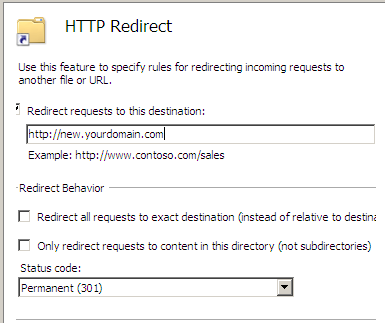
Now that your virtual directory is setup, you’ll want to add the Redirection configuration. Click on the virtual directory to highlight it, then find the HTTP Redirect option under the Feartures View page, and select that option. The HTTP Redirect Page should now appear, check the Redirect requests to this destination check box and this should now allow you to make changes to this page. In the textbox you’ll want to place the URL of the web address you want to redirect to, in the case of my example we chose new.yourdomian.com. You’ll next select the Redirect Behavior options you want, check either of the check boxes if they apply to the redirect you are trying to perform and then select the status code you want used for your redirect.
The options are:
Found (302): This redirect tells the client to perform a normal/new redirect to the URL
Permanent (301): This is a permanent Redirect and tells the client this URL has permanatly moved from www.yourdomain.com/new to new.yourdomain.com
Temporary (307): This redirect tells the client that for now use the new URL new.yourdomain.com, but in the future www.yourdomain.com/new will be used again.
The image blow is an example of what your HTTP Redirect options should look like.
Hope this post helps you get going on performing URL redirects on your websites. If you have any questions or comments please feel free to leave comments below.